Testing in Java using JUnit 5

This article was originaly published on September 18, 2024, on abubakersaeed.com before migrating it to here.
In this article we’ll be adding/implementing the
junittesting framework into the application; thegradlebuild tool is used while writing the article.
Installation
I'm using gradle version 8.8 to initialize a new project. It by default comes with a junit testing framework, but to keep everyone on the same route, I'll assume that everyone is working on an ongoing project and will proceed to start from the installation process, but for everything to work correctly the minimum required version of gradle is 4.6.
Add the necessary junit dependencies in the app/build.gradle file:
dependencies {

  ...

  testImplementation 'org.junit.jupiter:junit-jupiter:5.11.0'
  testRuntimeOnly 'org.junit.platform:junit-platform-launcher:1.11.0'

  ...

}
The dependencies versions are the latest at the time of writing the article, if the article is being read after a long time since the publishing date, please check and use the latest versions.
After adding the dependencies, we'll need to create a task named test which will be set to use the junit version 5 testing framework, add the following code at the end in the same file:
tasks.named('test') {
  useJUnitPlatform()
}
Once done, the application will be able to run tests, but currently, it will not log the test output in the console. To add that functionality, we can append the following code in the tasks block:
...

testLogging {
  events "started", "passed", "skipped", "failed"
}
Based on the desired output, we can remove the unnecessary events (events whose logs do not need to be output). Common events are normally passed and failed in most cases, but the rest might be useful depending on the situation.
Writing and running an test
Assuming the project’s structure is similar to the default, and it includes these two files:
app/src/main/java/org/example/App.javaapp/src/test/java/org/example/AppTest.java
If the second file is not present, please create it, as we’ll be working with these two files.
In the app/src/main/java/org/example/App.java file add the following code:
...

public class App {

    public String heading() {
        return "...";
    }

}
And in the app/src/test/java/org/example/AppTest.java file add this code:
...

import static org.junit.jupiter.api.Assertions.assertEquals;

import org.junit.jupiter.api.Test;

class AppTest {

    // annotation (required to label this method as test)
    @Test
    void headingTest() {
        App testClass = new App();

        String expectedResult = "Java does not seems to be going anywhere";
        assertEquals(expectedResult, testClass.heading());
    }

}
Open the terminal, change the active directory to the project's folder, and execute the following command to run the test:
./gradlew clean testThat’s it, we’ve successfully written our first test, which is failing as per the displayed output, so let’s adjust our test to make it pass in the next section.
Test report and correction
Note that when the test is run, a report is generated by gradle that can be accessed from app/build/reports/tests/test/index.html to view in a browser. If we navigate to the test we’ve created, a useful error message is displayed in the first line on why the test is failing:
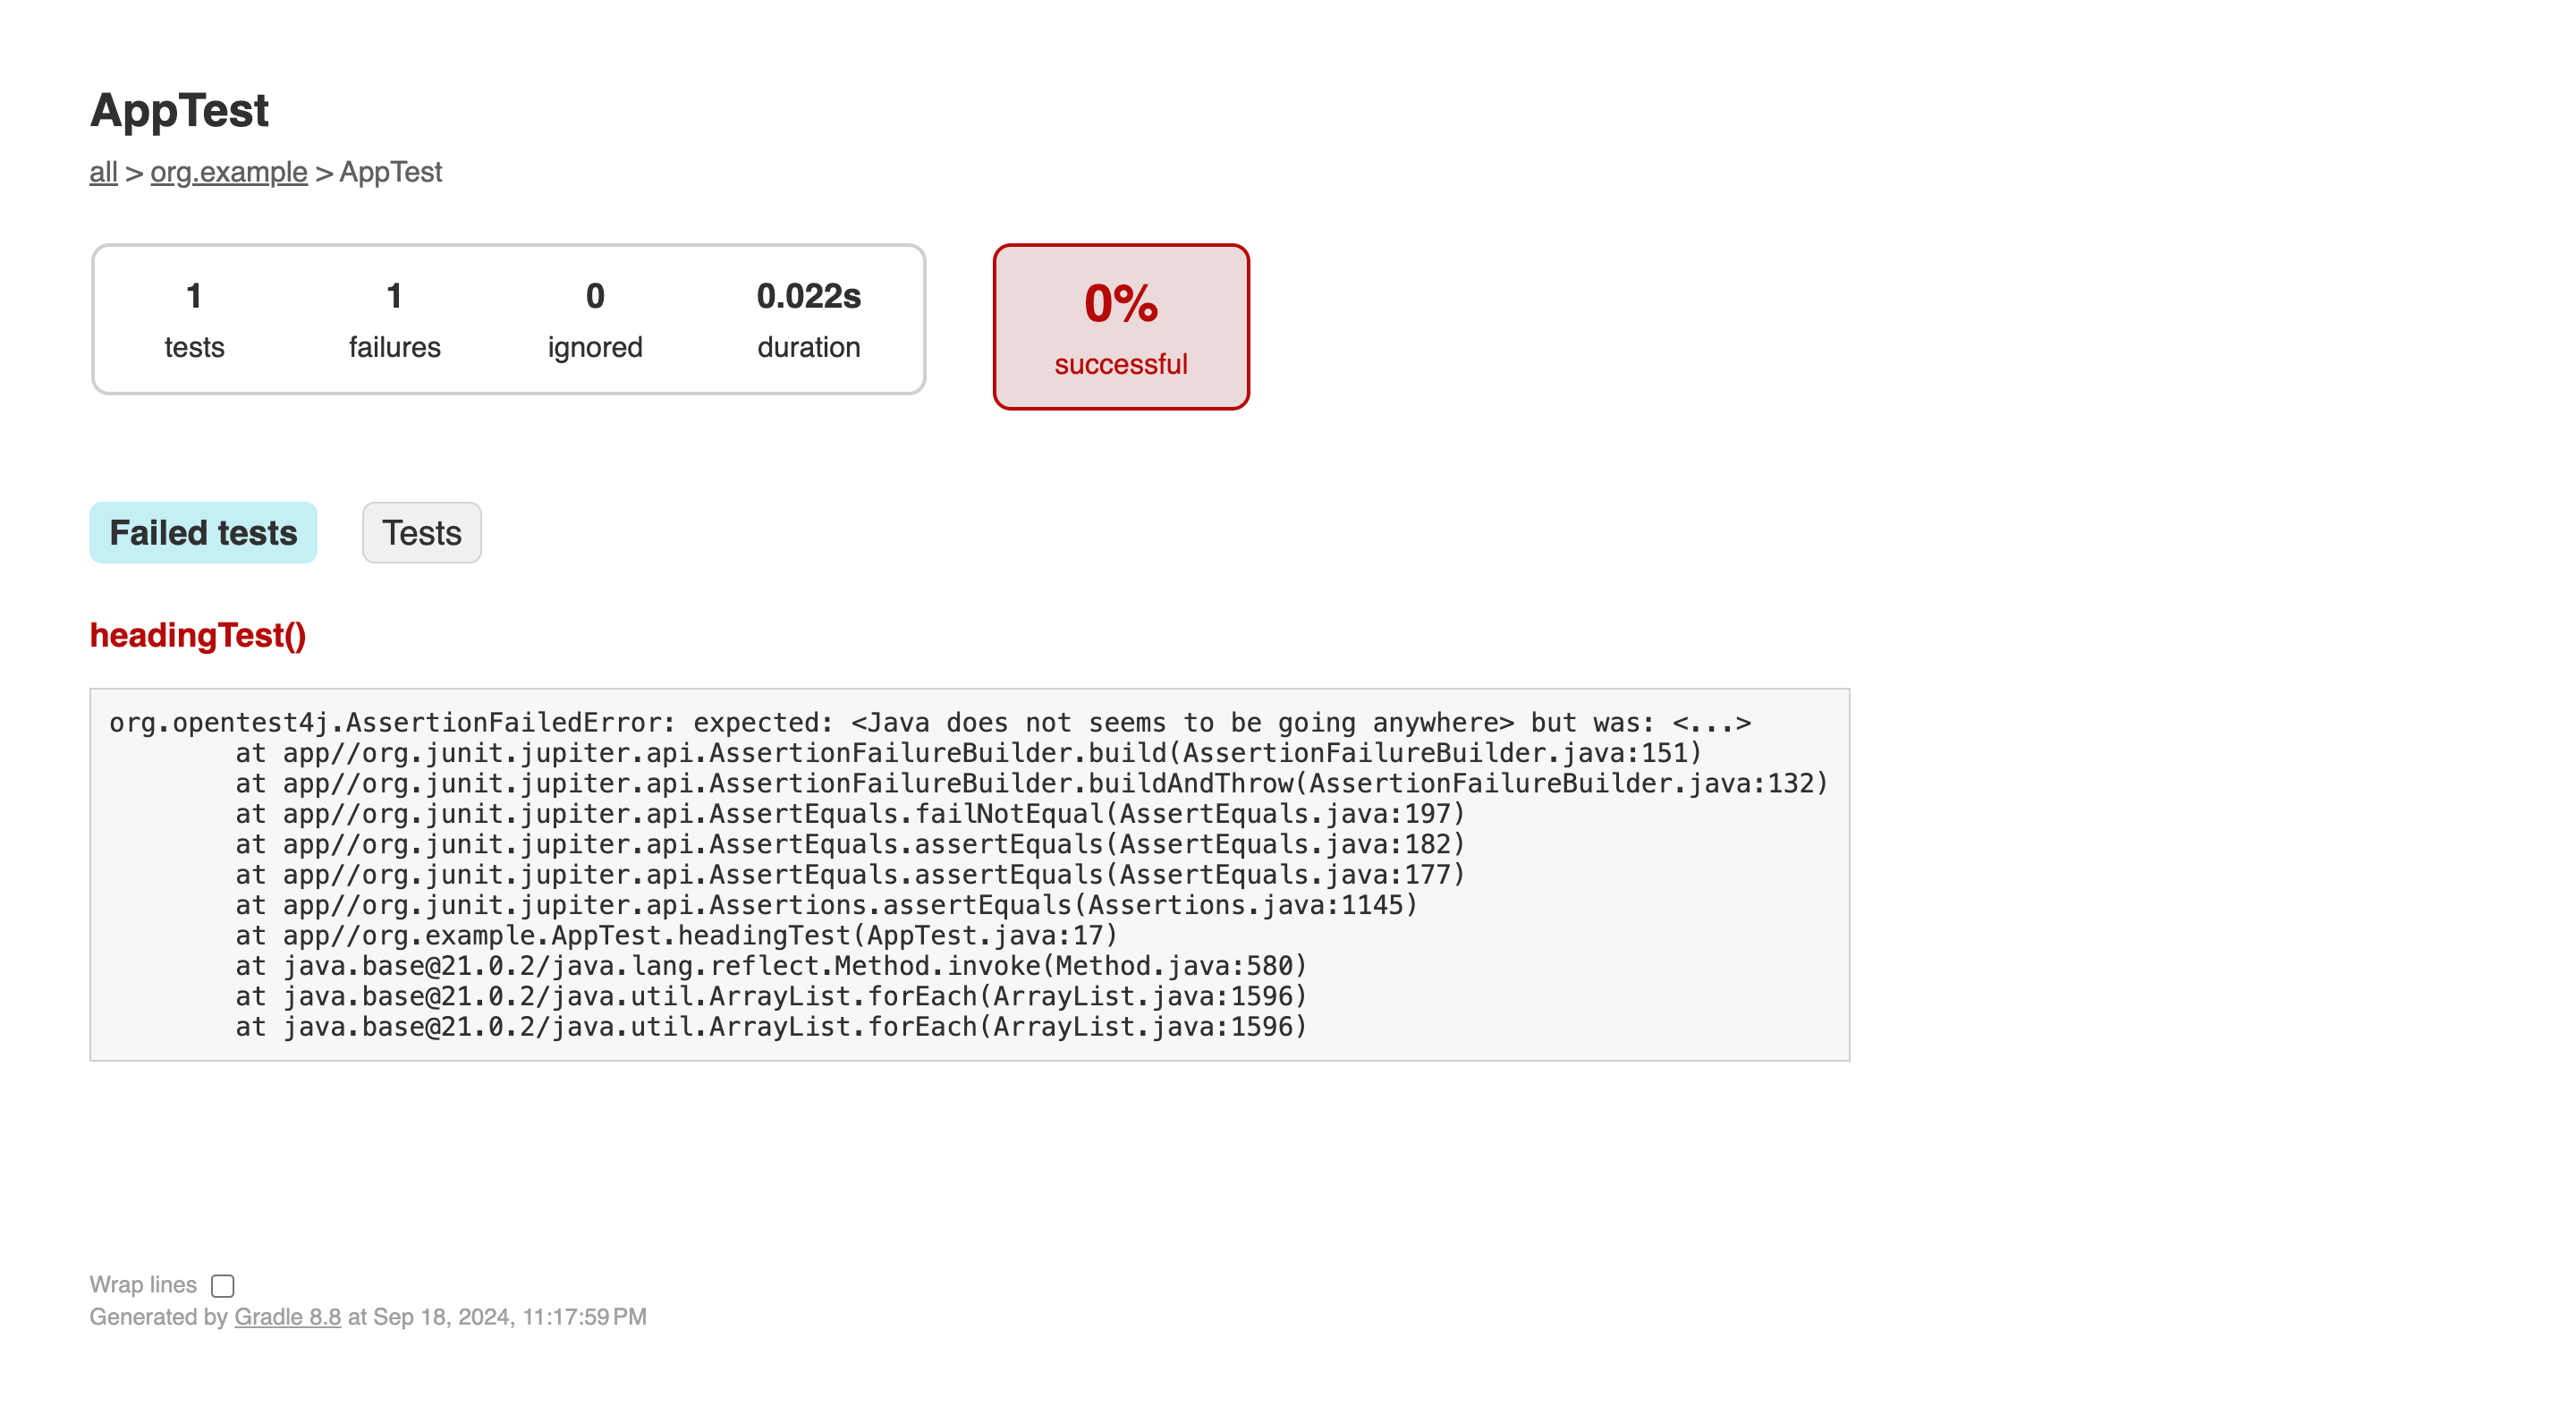
The assertEquals normally takes two arguments: the first is the expected value, and the second is the received value. Because the received result is different than the expected one, the test is failing. Let's update the code in the app/src/main/java/org/example/App.java file as follows:
public String heading() {
  return "Java does not seems to be going anywhere";
}
Execute the test command again, and the output will indicate that the test has been successfully passed.
Conclusion
This was a minimal article on how to implement and use the framework. The junit framework provides many more functionalities. If anyone is interested in exploring more, please check the framework's official document site.